Working with Lists
Many pages in OnTrack display information as lists, such as shipments, orders, inventory, or warehouses.
To help you quickly find and organize data, these lists support common interactions like:
These tools can be used individually or together to refine the results displayed on the page.
Searching
Use the search bar to quickly locate specific records.
To search, follow these steps:
- Click the search bar.
- Enter your search terms.
- Results are displayed automatically as you type.
- Review the results that match your search criteria.
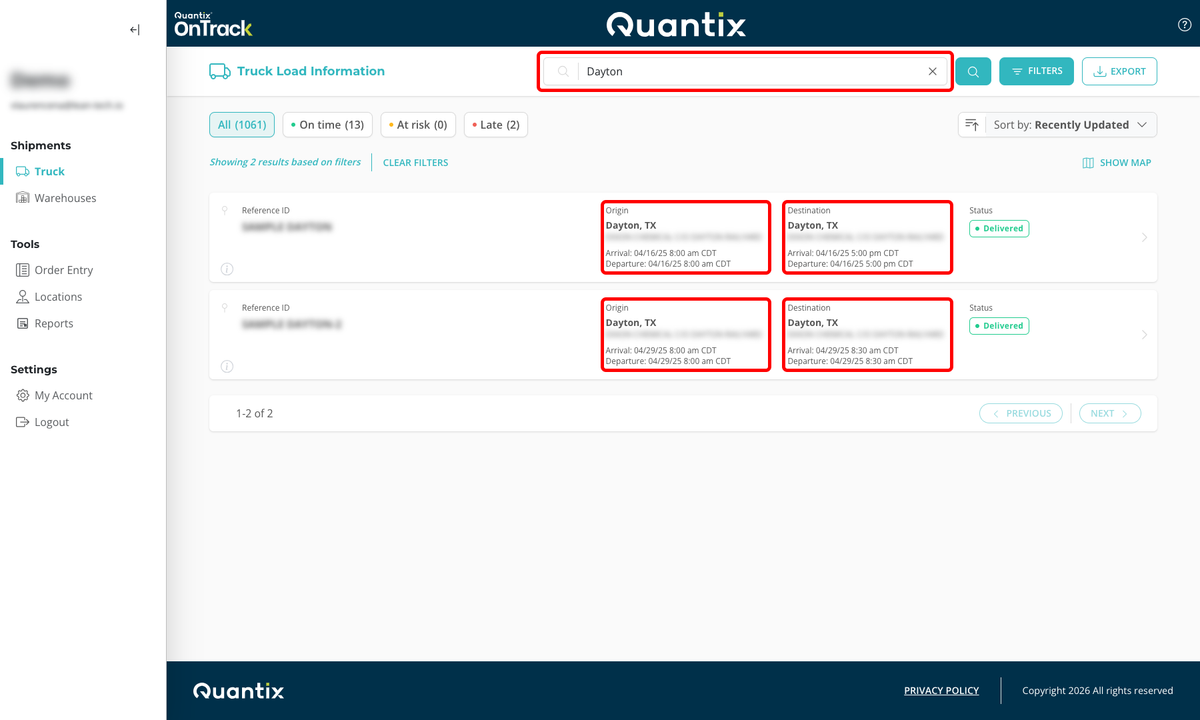
The only exception to this is the Truck Load Information page, which requires you to press Enter to execute the search after typing your search terms.
Depending on the page, you can search by values such as:
- Reference ID
- Location (city or state)
- Company name
- Material or product
Filtering
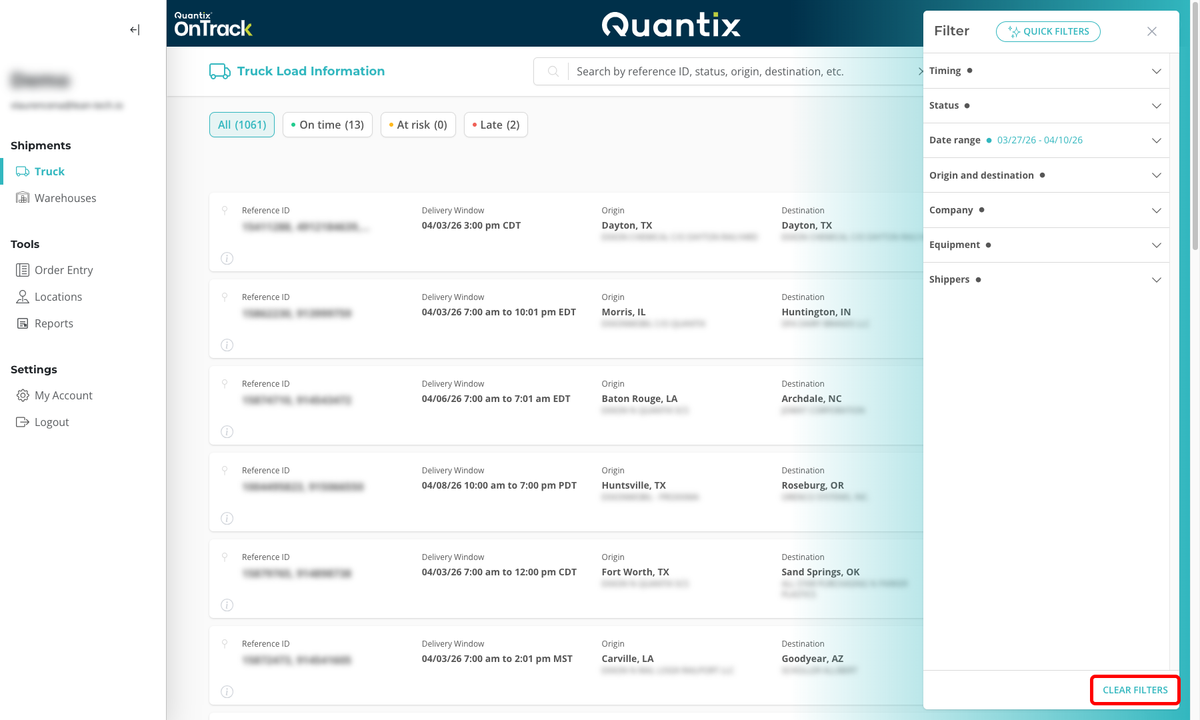
Filters allow you to narrow the list based on specific criteria.
Applying Filters
To apply filters, follow these steps:
- Click the FILTERS button.
- Select one or more criteria from the available options.
- Filters are applied automatically as you select them, and the list updates to show only matching results.
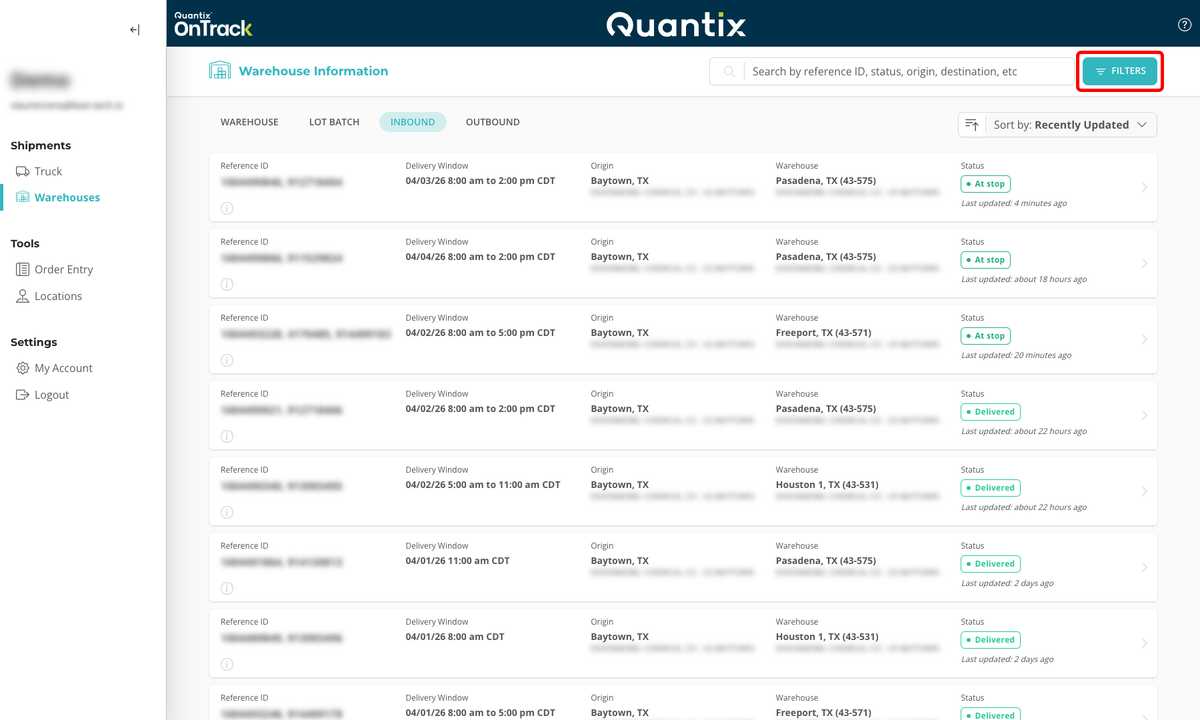
Common filter criteria include:
- Status (for example, In-Transit, Delivered)
- Date range
- Location (origin or destination)
- Equipment or configuration type
Multiple filters can be combined to create more precise results.
Resetting Filters
To reset the filters and view all results, follow these steps:
- Click the FILTERS button.
- Click the CLEAR FILTERS option.
Quick Filters
Quick Filters allow you to save a set of filter criteria and reuse it later.
Instead of manually configuring the same filters each time, you can save a Quick Filter once and apply it whenever needed.
Quick Filters are saved in the local browser, so they are only accessible on the device and browser where they were created. If you switch devices or browsers, or navigate in incognito mode, you will not see the Quick Filters created on that device.
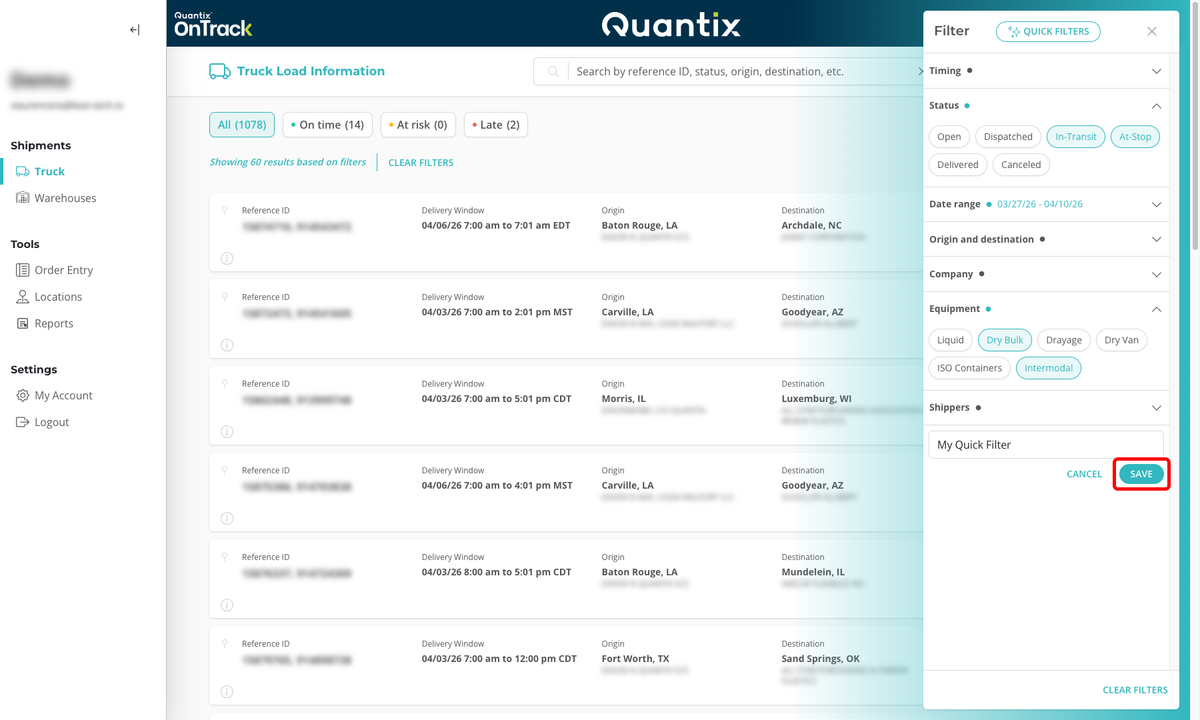
Saving Quick Filters
To save a Quick Filter, follow these steps:
- Open the FILTERS menu.
- Select the desired filter criteria.
- Click the Save as Quick Filter option.
- Provide a name for the Quick Filter and save it.
- Click the SAVE button.
Quick Filters cannot be edited after they are saved. To make changes, you will need to delete the existing Quick Filter and create a new one with the updated criteria.
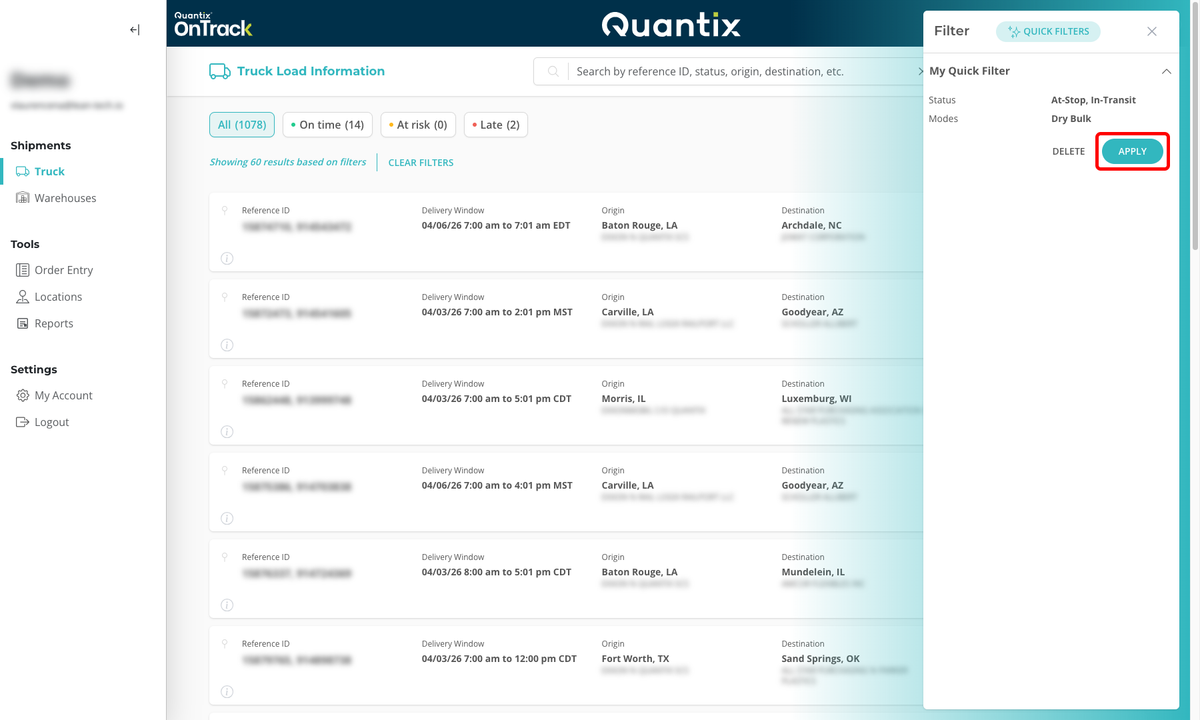
Applying Quick Filters
To apply a saved Quick Filter, follow these steps:
- Click the FILTERS button.
- Click the QUICK FILTERS option.
- Click the name of the saved filter you want to apply.
- Click the APPLY button.
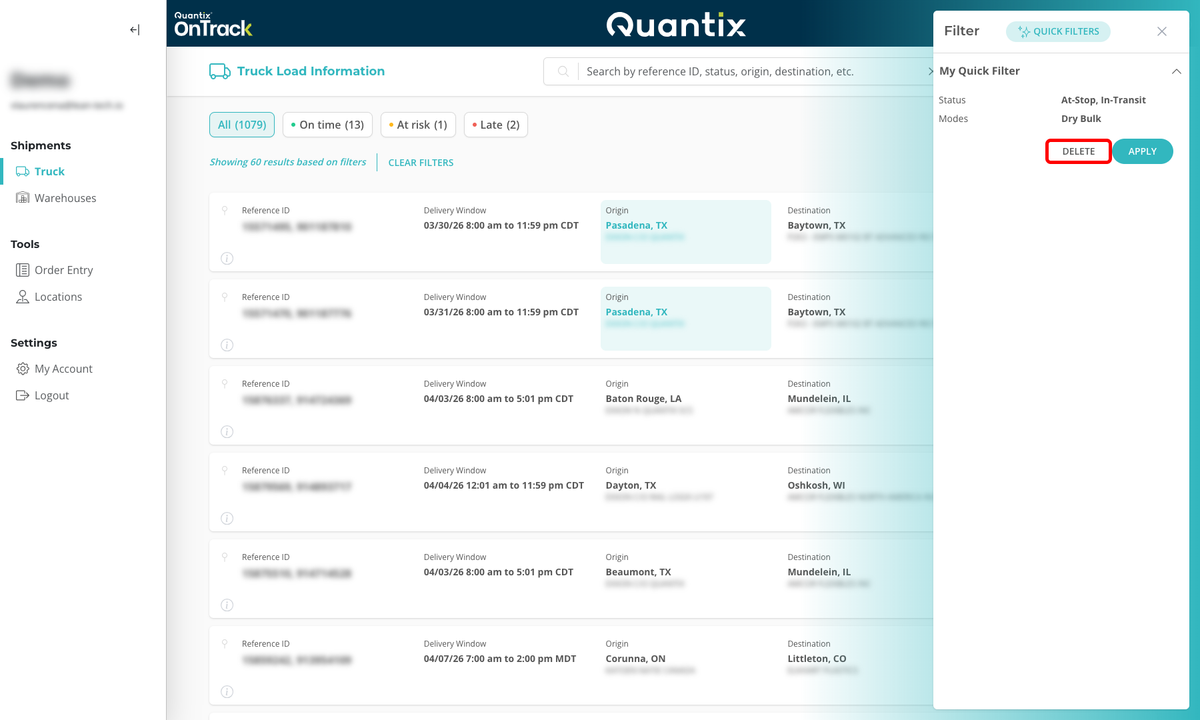
Deleting Quick Filters
To delete a saved Quick Filter, follow these steps:
- Click the FILTERS button.
- Click the QUICK FILTERS option.
- Click the name of the saved filter you want to delete.
- Click the DELETE button.
Deletion is permanent and cannot be undone.
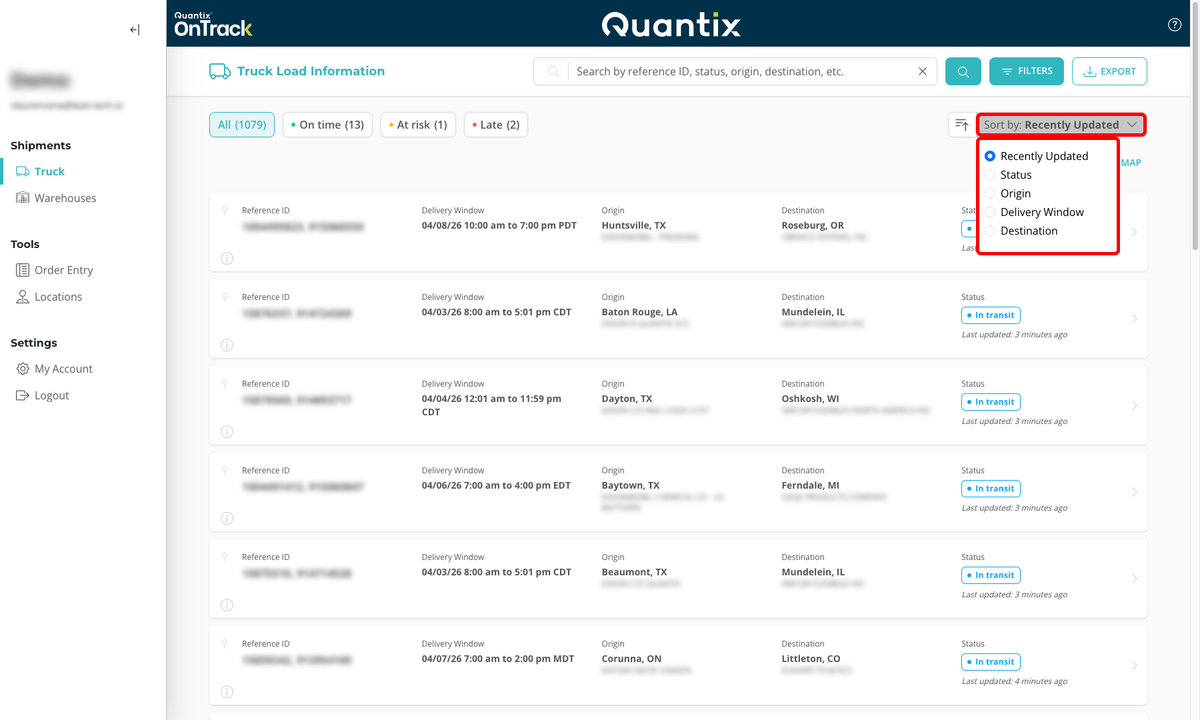
Sorting
Sorting allows you to organize the list based on a selected field.
To sort results, follow these steps:
- Select a sorting option from the Sort by dropdown.
- Choose the desired criteria (for example, Status, Origin, or Recently Updated).
- Toggle between ascending and descending order using the sort direction control.
Sorting helps prioritize and organize information based on your needs.
Exporting
Some list pages allow you to export the data currently displayed in the list to a CSV file.
This can be useful when you want to review the data outside OnTrack, share it with others, or keep a copy for reporting purposes.
Before exporting, you can use the searching and filtering functionalities to limit the list to only the records you want to include.
Once the list shows the data you want to export, click the EXPORT button in the top-right corner of the page.
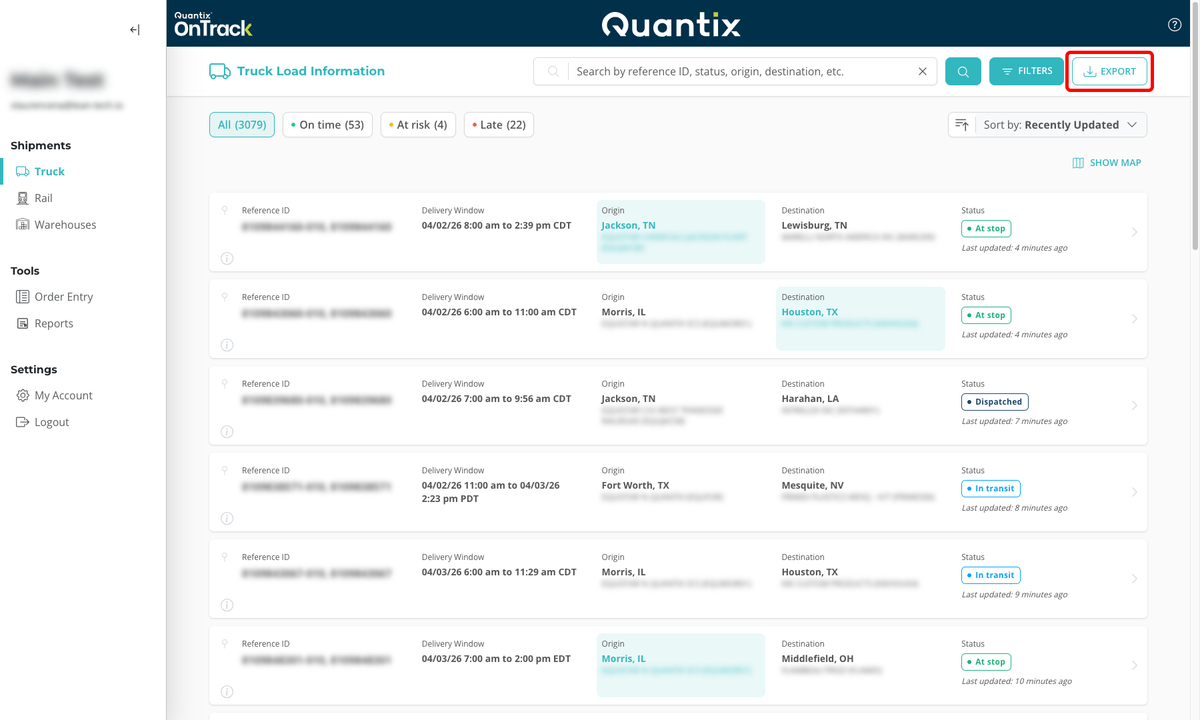
OnTrack then downloads the exported file to your computer in CSV format.
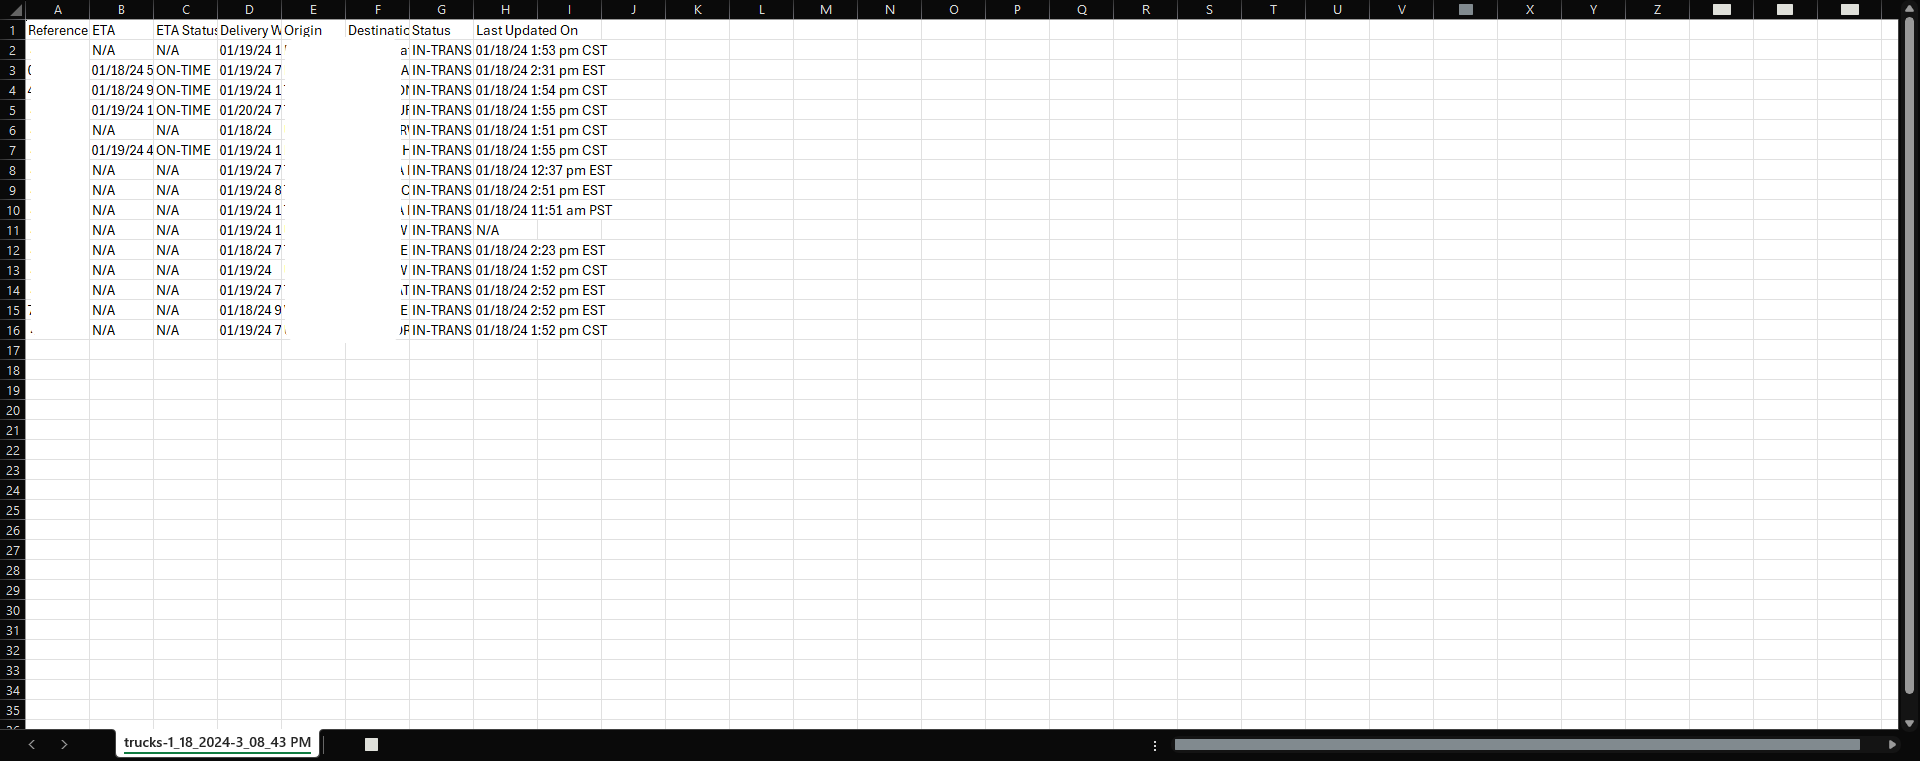
What is a CSV file?
A CSV (Comma-Separated Values) file is a plain text file used to store tabular data. Each row in the file represents a record, and each value is separated by a comma.
CSV files can be opened with many spreadsheet applications, including:
- Microsoft Excel
- Google Sheets
- LibreOffice Calc
The exported file will look similar to this: